No products in the cart.


4. CF640 Tunel Cell Apoptosis Detection Kit; 50 T $700 (100T 1200)
$700.00
In Stock
Description
Product Information
| Product Name | Cat.No | Spec. |
| CF640 Tunel Cell Apoptosis Detection Kit | G1505-50T | 50 T |
| G1505-100T | 100 T |
Introduction
The breakage of chromosomal DNA in apoptosis is a gradual process. Chromosomal DNA is first degraded into large fragments of 50-300 KB under the action of endogenous nuclease hydrolase, and then about 30% of chromosomal DNA is randomly cut between nucleosome units under the action of Ca2+ and Mg2+ dependent endonuclease to form 180-200 BP nucleosome DNA polymers. Therefore, in the late stage of apoptosis, DNA will be degraded into 180-200 BP fragments, and a large number of 3′-OH terminals are exposed on the broken genomic DNA. Terminal deoxyribonucleotidyl transferase (TDT) is a template independent DNA polymerase, which can catalyze the binding of deoxynucleotides to the 3′-OH terminal of broken DNA molecules. Therefore, TUNEL (TDT mediated dUTP nick end labeling) cell apoptosis detection kit can be used to detect the nuclear DNA breakage of tissue cells in the late process of apoptosis. The principle is that, under the action of TdT enzymes, 3′-OH exposed at the end of genomic DNA breaks are incorporated with CF640-dUTP, which can be detected by fluorescence microscopy or flow cytometry (CF640 excitation 642 nm, emission 662 nm). This kit has a wide range of applications and is suitable for apoptosis detection of paraffin tissue sections, frozen tissue sections, cell crawling, cell smears, etc.
Storage and Handling Conditions
Wet ice transport;
This kit is stored at -20 °C, CF640-dUTP Labeling Mix should be stored at -20 °C protected from light and valid for 12 months.
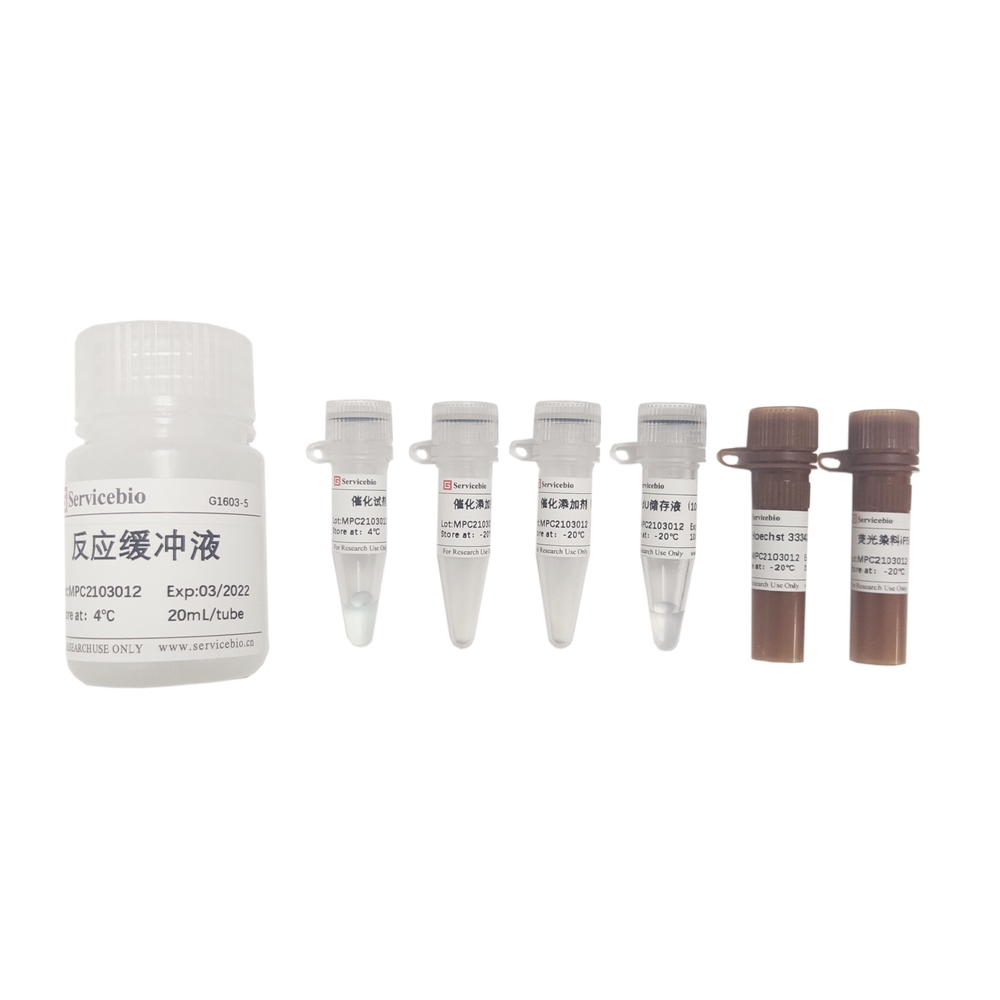
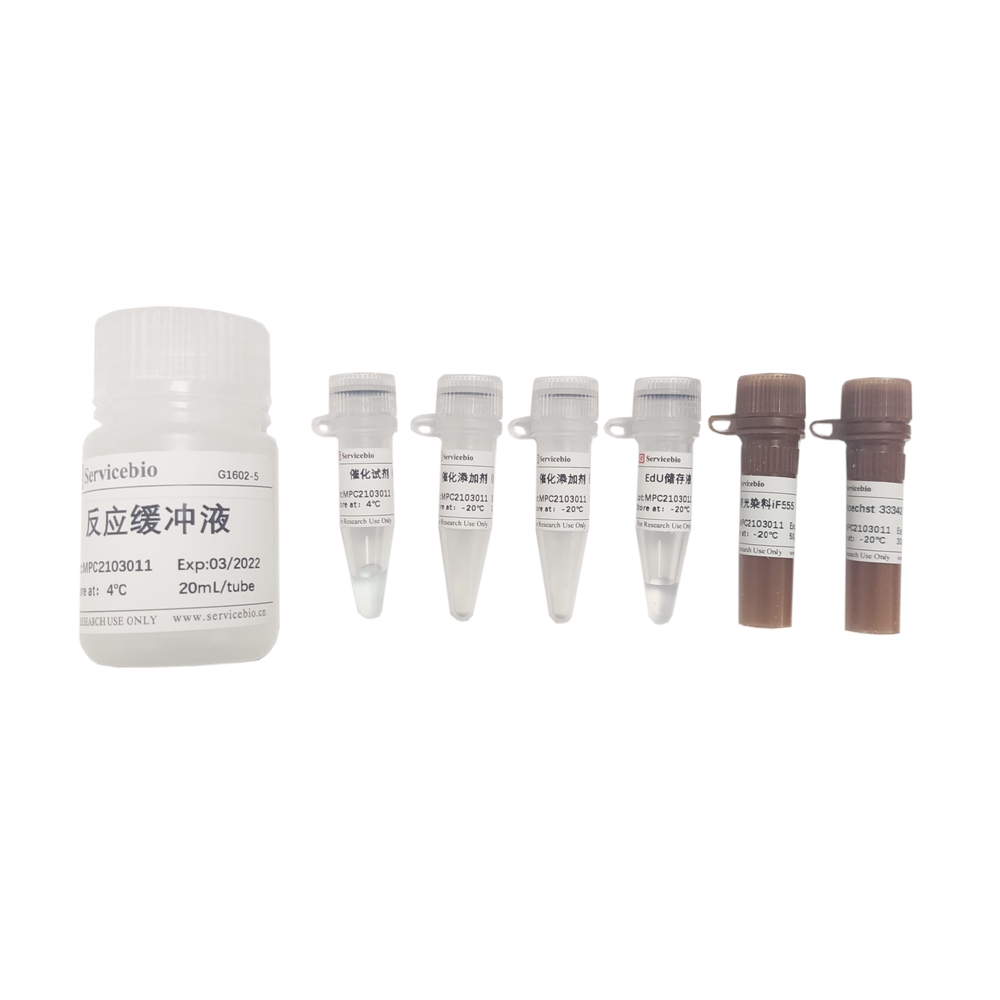
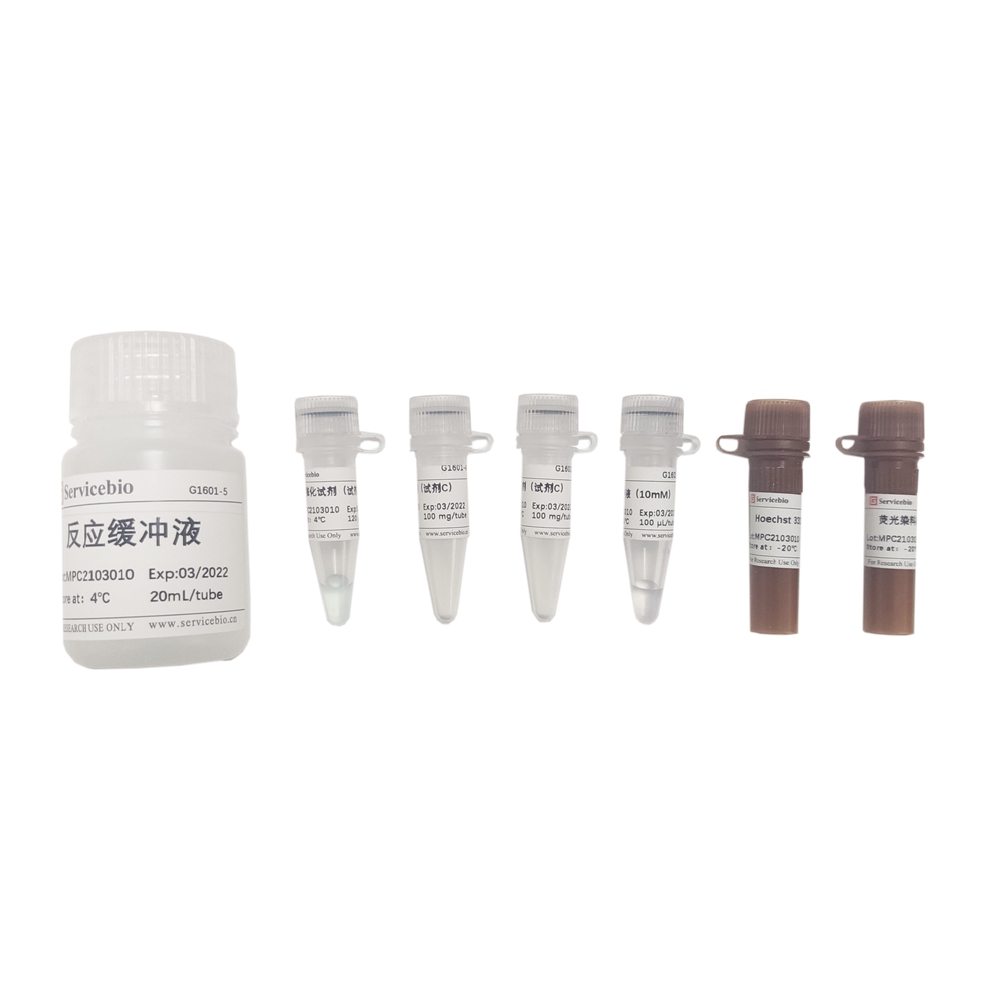
Components
| Component Number | Component | G1505-50T | G1505-100T |
| G1505-1 | Recombinant TdT Enzyme | 50 µL | 2×50 µL |
| G1505-2 | CF640-dUTP Labeling Mix | 250 µL | 2×250 µL |
| G1505-3 | Equilibration Buffer | 5×1 mL | 10×1 mL |
| G1505-4 | Proteinase K (200 µg/mL) | 1 mL | 2×1 mL |
| Instruction Manual | 1 pc | ||
Preparation
1. PBS phosphate buffer (recommended G0002 or G4202) ;
2. Fixative solution: 4% paraformaldehyde dissolved in PBS,pH 7.4 (recommended G1101) ;
3. Membrane breaking liquid:0.1%-0.5% Triton X-100 (recommended G1204) ;
4. If you need to dye the nucleus, you need to bring your own DAPI (2 µg/mL) or PI (1 µg/mL) (recommended G1012, G1021);
5. If you need a positive control experiment, you need to bring your own DNase I (recommended G3342)
6. If using a flow cytometer, bring your own PI staining solution (recommended G1021) and RNase A (DNase free) (recommend G3413);
7. Wear a lab coat and disposable gloves when operating.
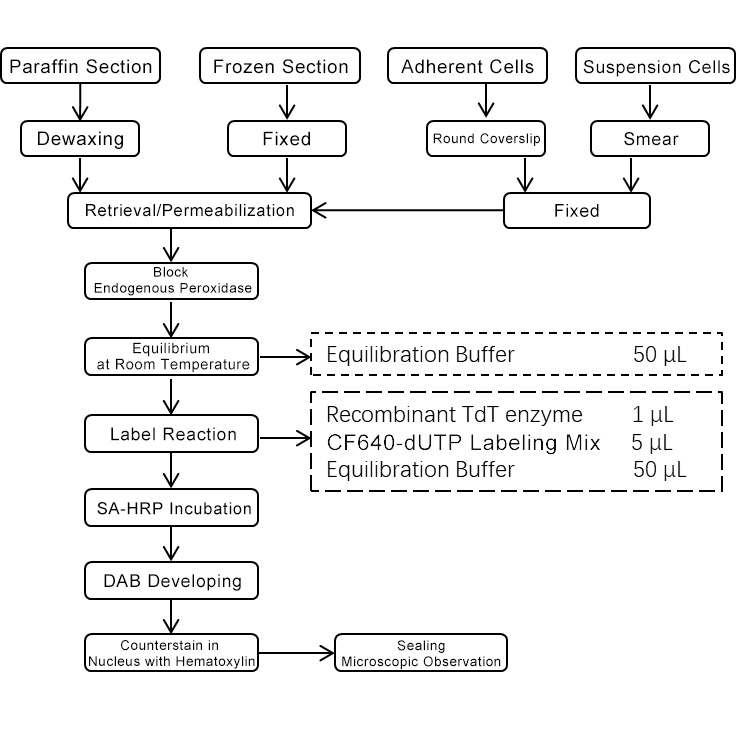
Assay Protocol / Procedures
1. Sample Preparation
a. Paraffin Tissue Sections
1) Soak paraffin tissue sections in xylene for 5-10 min at room temperature and repeat 2-3 times; Then soaked in absolute ethanol for 5 min and repeated 2 times; Finally, it was soaked with gradient ethanol (85%, 75%, and double distilled water) once for 5 min each time;
2) Gently moisten the slices with PBS and remove the excess liquid around the sample. Use a histochemical pen to draw a small circle 2-3 mm apart from the tissue along the peripheral contour of the tissue, so as to facilitate downstream permeability treatment and balance marking. During the experiment, do not let the sample dry, and put the treated sample in the wet box to keep the sample moist;
3) Prepare Proteinase K working solution: dilute Proteinase K (200 µg/ml) stock solution with PBS as diluent at the volume ratio of 1:9, so that the final concentration is 20 μg/mL;
4) Add 100 μL Proteinase K working solution drops to each sample, completely covered the tissue and incubated at 37 ℃ for 20 min;
Note: Proteinase K treatment is mainly helpful for the permeability of staining reagents in subsequent steps of tissues and cells. Too long or too short incubation time will affect the subsequent labeling efficiency. In order to obtain better results, the incubation time of Proteinase K can be optimized.
5) Soak and clean the sample with PBS solution for 3 times, each time for 5 min (Proteinase K needs to be cleaned, otherwise it will interfere with the subsequent marking reaction). The treated sample is placed in a wet box to keep the sample moist;
6) (optional steps) remove the excess liquid from the sample, add an appropriate amount of membrane breaking liquid to the tissue, fully infiltrate the tissue, and treat at room temperature for 20 min; After the membrane breaking treatment is completed, the sample shall be moistened with PBS solution for 3 times for 5 min each time; The treated sample is placed in a wet box to keep the sample moist;
b. Frozen Tissue Sections
1) Immerse the slide in 4% paraformaldehyde solution (dissolved in PBS) for fixation, and incubate at room temperature for 10-15 min;
2) After the film is removed from the fixing liquid, it shall be naturally dried in the fume hood;
3) Put the slide into pure water or PBS for moistening and washing, and remove the residual fixed liquid on the slide;
4) Draw a small circle 2-3 mm apart from the tissue along the peripheral contour of the tissue with a histochemical pen to facilitate downstream permeability treatment and balance marking; During the experiment, do not let the sample dry, and put the treated sample in the wet box to keep the sample moist;
5) Prepare Proteinase K working solution: dilute Proteinase K (200 µg/ml) stock solution with PBS as diluent at the volume ratio of 1:9, so that the final concentration is 20 μg/mL;
6) Add 100 μL Proteinase K working solution drops to each sample, completely covered the tissue and incubated at room temperature for 10 min;
Note: Proteinase K treatment is mainly helpful for the permeability of staining reagents in subsequent steps of tissues and cells. Too long or too short incubation time will affect the subsequent labeling efficiency. In order to obtain better results, the incubation time of Proteinase K can be optimized
7) Moisten the sample with PBS solution for 2-3 times to remove the excess liquid (Proteinase K needs to be cleaned, otherwise it will interfere with the subsequent marking reaction). The treated sample is placed in a wet box to keep the sample moist;
8) (optional steps) add an appropriate amount of membrane breaking liquid to the tissue, fully infiltrate the tissue, and treat it at room temperature for 20 min. After the membrane breaking treatment, similarly wash the sample with PBS solution to remove the excess liquid. The treated sample is placed in a wet box to keep the sample moist;
c. Cell Crawling
1) Adherent cells were cultured on lab-Tek (Chamber Slides). After apoptosis induction treatment, the slides were gently rinsed twice with PBS;
2) Add an appropriate amount of 4% paraformaldehyde solution (dissolved in PBS) to each slide chamber for fixation, and incubate at room temperature for 20 min;
3) Remove the fixative and add PBS for cleaning for 3 times, each time for 5 min;
4) Each sample was immersed in membrane breaking solution and incubated at room temperature for 5 min for permeability treatment;
5) Immerse the cleaning sample in an open beaker containing PBS solution for 2-3 times;
6) Gently remove excess liquid and carefully drain the liquid around the sample on the slide with filter paper. The treated sample is placed in a wet box to keep the sample moist.
d. Cell Smear
1) Resuspend cells in PBS at a concentration of approximately 2×10⁷ cells/mL, pipette 50-100 μL of cell suspension onto an anti-defossing slide, and gently coat the cell suspension using a clean slide;
2) Immerse the slides in a staining jar filled with 4% paraformaldehyde freshly formulated in PBS, fix the cells, and leave at 4 °C for 25 min;
3) Immerse the slide in PBS, place it at room temperature for 5 min, and repeat once;
4) Gently remove the excess liquid, and carefully drain the excess liquid around the sample on the slide with filter paper, draw a small circle along the outer contour of the cell with a histochemical pen to facilitate downstream permeability processing and balance labeling operations, and do not allow the sample to dry during the experiment;
5) Each sample is immersed in membrane breaking solution and incubated at room temperature for 5 min for permeability treatment;
6) Immerse the cleaning sample in an open beaker containing PBS solution for 2-3 times;
7) Gently remove excess liquid and carefully drain the liquid around the sample on the slide with filter paper. The treated sample is placed in a wet box to keep the sample moist.
2. Dnase I Treatment Positive Control Experiment (Optional Steps)
After the sample permeability treatment, treat the sample with DNase I (recommended G3342) to prepare the positive control.
1) Add 100 μL 1 × DNase I buffer (preparation method: take 10 μL 10 × DNase I buffer, and then add 90 μL deionized water mixed evenly) to the permeable sample and incubated at room temperature for 5 min;
2) Gently remove excess liquid and add 100 μL working liquid containing DNase I (20 U/ml) (preparation method: take 10 μL 10×DNase I buffer, and then add 2 μL DNase I, add 88 μL deionized water mixed evenly), incubate at room temperature for 10 min;
3) Gently remove the excess liquid, and thoroughly wash the slide 3-4 times in the staining tank with PBS;
(Note: the positive control slide must use a separate staining cylinder, otherwise the residual DNase I on the positive control slide may introduce a high background on the experimental slide).
3. Marking and Testing
1) Equilibration: 50 μL of Equilibration Buffer is added dropwise to each sample to cover the area of the sample to be examined and incubated for 10 min at room temperature;
2) Labeling solution preparation: thaw CF640-5-dUTP Labeling Mix and Equilibration Buffer on ice and mix sufficient TdT incubation buffer according to the Recombinant TdT enzyme: CF640-5-dUTP Labeling Mix: Equilibration Buffer=1 μL: 5 μL: 50 μL (1: 5: 50) ratio. The volume of reagents used in specific experiments can be adjusted in an appropriate equal proportion according to the size of the slide;
3) Negative control system: Prepare a control TdT incubation buffer without Recombinant TdT enzyme and replace it with ddH2O;
4) Labeling: Try to remove the equilibration Buffer as much as possible and then add 56 μL of TdT incubation buffer to each tissue sample and incubate at 37 °C for 1 h; Note that the slides should not be dried, and the slides should be protected from light;
5) Immediately wash the tissue samples with PBS and wash 4 times for 5 min each;
6) Gently wipe off the PBS solution around the sample with filter paper;
7) Nuclear staining: The samples are stained in a staining vat, and the slides are immersed in a staining jar filled with PI solution or DAPI solution (freshly formulated and diluted with PBS) in the dark for 8 min at room temperature;
8) Sealing: After the sample staining is completed, wash the tissue sample 3 times with PBS for 5 min each, then gently remove the excess liquid and mounting the slide use the anti-fluorescence quenching mounting medium (recommended G1401) ;
9) Microscopy: Immediately analyze the sample under a fluorescence microscope, the slides are carefully protected from light, PI/DAPI can stain both apoptotic and not apoptotic cells red/blue, and only in the apoptosis nuclei are CF640-5-dUTP incorporated and positioned green fluorescence。
4. Suspension Cells are Detected Using Flow Cytometry
1) The cells to be detected are washed twice with PBS, centrifuged at 4 °C (500 g) and resuspended in 500 μL PBS;
2) Fixation: Add 5 mL 1% paraformaldehyde solution prepared with PBS to the sample, fix the cells, and leave on ice for 20 min;
3) Cells are centrifuged at 4 °C, 300 g for 10 min, supernatanted and resuspended twice with 5 mL PBS, and finally resuspended cells with 500 μL PBS;
4) Permeability: Add 5 mL of pre-chilled 70% ethanol on ice to the sample, incubate at -20 °C for 4 h, permeable cells;
(Note: Cells can also be permeated with membrane breaking solution at room temperature for 5 min)
5) Cells are resuspended with 5 mL PBS after centrifugation at 300 g for 10 min and resuspended with 1 mL PBS after centrifugation again;
6) 6. Equilibrate: Transfer approximately 2×10⁶ cells to a 1.5 mL microcentrifuge tube, centrifuge at 300 g for 10 min, remove the supernatant, and resuspend with 80 μL Equilibration Buffer, incubate for 5 min at room temperature;
7) 7. Labeling solution preparation: thawing CF640-dUTP Labeling Mix and Equilibration Buffer on ice, and following the Recombinant TdT enzyme: CF640-dUTP Labeling Mix: Equilibration Buffer = 1 μL: 5 μL: 50 μL (1:5:50) proportional mixing is sufficient for all experiments and TdT incubation buffer for optional positive control reactions;
8) Labeling: Cells centrifuged at 300 g for 10 min, decanted and resuspended the pellet in 56 μL TdT incubation buffer, incubated at 37 °C for 1 h, protected from light. Gently resuspend cells with a micropipette every 15 min;
9) After the reaction is complete, add 1 mL of 20 mM EDTA to terminate the reaction and mix gently with a micropipette;
10) Centrifuge at 300 g for 10 min, remove the supernatant and resuspend the pellet in 1 mL of membrane breaking solution containing 5 mg/mL BSA, repeat wash 2 times;
11) Nuclear staining: Centrifuge at 300 g for 10 min, remove the supernatant and resuspend the cell pellet in 0.5 mL PI solution containing 250 μg of DNase-free RNase A, incubate the cells for 30 min at room temperature in the dark;
12) Hands-on detection: Flow cytometry analyzes cells, PI can dye both apoptotic and unpoptoptotic cells red, and only in the apoptosis nucleus does CF640-dUTP incorporate and locate the green fluorescence。
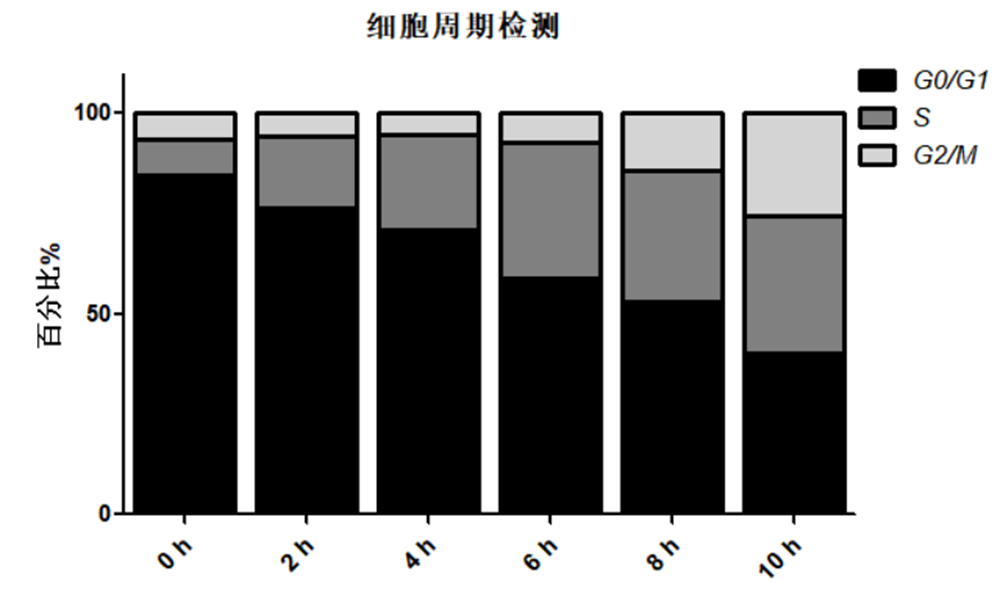
5. Experimental Process Diagram
Note
Please pay attention to the protection when operating.
This product is for scientific research purposes only and is not intended for clinical diagnosis!
Product recommendation
|
Cat.No.
|
Product Name
|
Spec.
|
Operation
|
|---|
|
G1501-100T
|
Fluorescein (FITC) Tunel Cell Apoptosis Detection Kit
|
100 T
|
|
|
G1501-50T
|
Fluorescein (FITC) Tunel Cell Apoptosis Detection Kit
|
50 T
|
|
|
G1502-100T
|
TMR (Red) Tunel Cell Apoptosis Detection Kit
|
100 T
|
|
|
G1502-50T
|
TMR (Red) Tunel Cell Apoptosis Detection Kit
|
50 T
|
|
|
G1504-100T
|
CF488 Tunel Cell Apoptosis Detection Kit
|
100 T
|
|
|
G1504-50T
|
CF488 Tunel Cell Apoptosis Detection Kit
|
50 T
|
|
|
G1505-100T
|
CF640 Tunel Cell Apoptosis Detection Kit
|
100 T
|
|
|
G1505-50T
|
CF640 Tunel Cell Apoptosis Detection Kit
|
50 T
|
|
|
G1507-100T
|
DAB (SA-HRP) Tunel Cell Apoptosis Detection Kit
|
100 T
|
|
|
G1507-50T
|
DAB (SA-HRP) Tunel Cell Apoptosis Detection Kit
|
50 T
|
|
|
G1510-100T
|
Annexin V-EGFP/PI Cell Apoptosis Detection Kit
|
100 T
|
|
|
G1510-50T
|
Annexin V-EGFP/PI Cell Apoptosis Detection Kit
|
50 T
|
|
|
G1511-100T
|
Annexin V-FITC/PI Cell Apoptosis Detection Kit
|
100 T
|
|
|
G1511-50T
|
Annexin V-FITC/PI Cell Apoptosis Detection Kit
|
50 T
|
|
|
G1512-100T
|
Annexin V-PE/7-AAD Cell Apoptosis Detection Kit
|
100 T
|
|
|
G1512-50T
|
Annexin V-PE/7-AAD Cell Apoptosis Detection Kit
|
50 T
|
|
|
G1513-100T
|
Annexin V-IF488/PI Cell Apoptosis Detection Kit
|
100 T
|
|
|
G1513-50T
|
Annexin V-IF488/PI Cell Apoptosis Detection Kit
|
50 T
|
|
|
G1514-100T
|
Annexin V-IF647/PI Cell Apoptosis Detection Kit
|
100 T
|
|
|
G1514-50T
|
Annexin V-IF647/PI Cell Apoptosis Detection Kit
|
50 T
|
|
|
G1700-50T
|
Cell Cycle and Apoptosis Detection Kit
|
50 T
|